
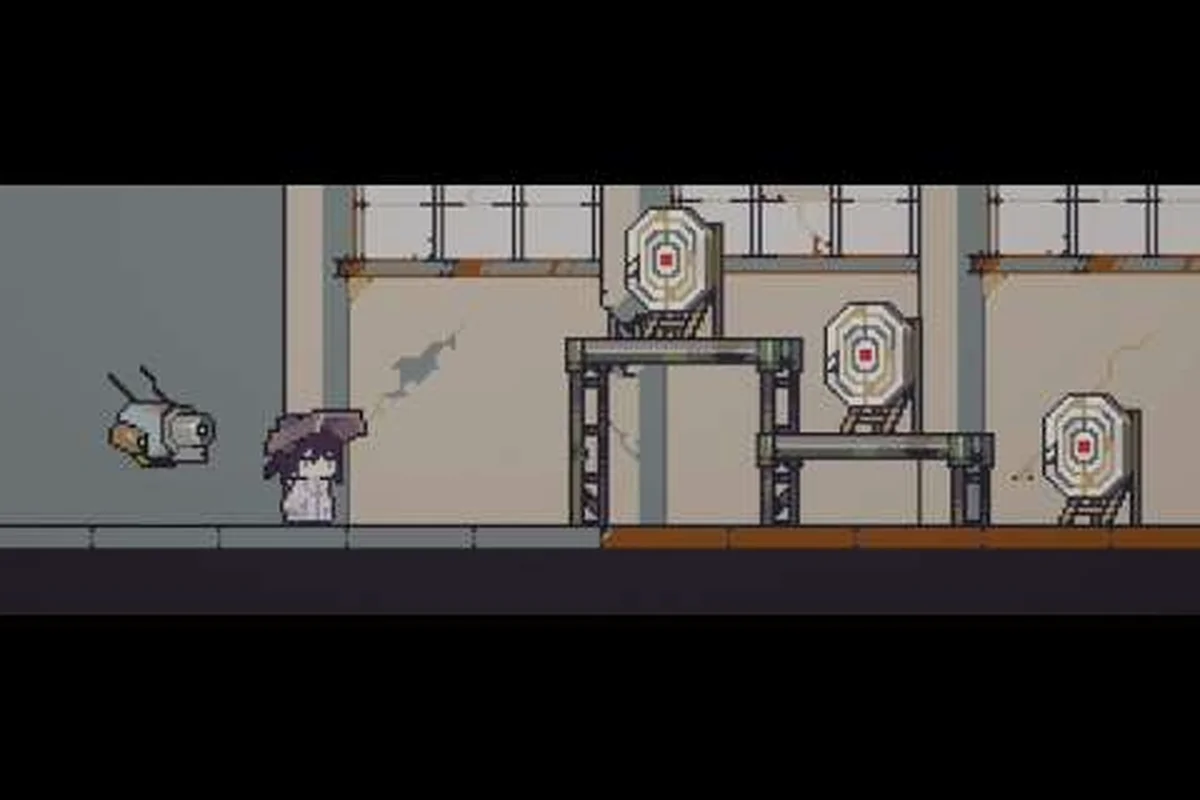
Combat in Doloc Town revolves around a single piece of gear that follows your farmer everywhere: the combat drone. If you're searching for a Doloc Town combat drone guide that actually explains how weapons, chips, and dodge windows interact, this breakdown walks through every layer — from the auto-fire toggle all the way to surviving the Drone 33 bullet hell. According to the official Doloc Town page on Steam, the drone is your only reliable weapon system, so tuning it correctly is the difference between clearing the Old City Ruins in one run and burning through your repair kits on every attempt.
Combat Drone Fundamentals and Control Modes
The combat drone attaches to your settler the moment you leave the Outskirts tutorial and never leaves your side. It hovers above Proti's shoulder, fires independently, and can be redirected with light input, which means farming and fighting share the same rhythm. Per the developer's combat overview (verified via the Steam store description), the drone handles auto-shooting by default so you can focus on dodging, planting, or talking to NPCs while it engages every hostile within range.
Three control modes change how the drone behaves, and switching mid-fight is allowed without penalty:
| Control Mode | Aim Behavior | Best For | Stamina Cost |
|---|---|---|---|
| Auto-Lock | Targets nearest enemy | Farming runs, resource clearing | None |
| Manual Aim | Follows your cursor | Boss fights, precision chip triggers | Light drain |
| Defensive Hover | Strafes around Proti | Surviving bullet hell patterns | Constant drain |
Auto-Lock is the default because most encounters in the River Valley and Wetlands involve clusters of small hostiles. Manual Aim is what you want whenever you face Drone 33 or any arena with destructible cover, because precise chip triggers require you to land hits on marked weak points. Defensive Hover is rarely optimal, but during the Lotus Marsh ambush waves it can buy you the few extra frames needed to reach a safe tile.
The drone's fire rate scales with your character level, but its damage output is gated almost entirely by the weapon and chips you slot into it. That distinction matters: a level 12 drone with starter gear still underperforms a level 6 drone carrying a tier-3 weapon and two offensive chips. If you want a deeper walkthrough on stat breakpoints, the Drone Upgrade Guide covers each level's expected returns.
Weapon Loadout Options and Tier Comparison
Every weapon you craft is a drone weapon, not a hand weapon, so damage numbers from gear sets designed for melee builds elsewhere do not translate. The weapon categories reported by players in community testing follow a clear hierarchy, with overlap at the top end for specific matchups.
| Weapon Tier | Fire Pattern | Damage Profile | Chip Synergy | Acquisition |
|---|---|---|---|---|
| Tier 1 — Salvaged | Single shot | Low, fast | Attack-speed chips | Outskirts loot |
| Tier 2 — Standard | 3-round burst | Balanced | Mixed support | Eden vendors |
| Tier 3 — Forged | 5-round spread | High burst | Crit + pierce chips | River Valley smith |
| Tier 4 — Eden-Tagged | Sustained beam | Highest single-target | Special ability chips | Old City Ruins drops |
Damage Numbers by Weapon Tier
-
Tier 1: 8–12 damage per hit, ~3 shots per second
-
Tier 2: 18–24 damage per burst, 1.2 bursts per second
-
Tier 3: 35–45 damage per spread, 1 spread per second
-
Tier 4 (Eden-Tagged): 60+ damage per second sustained, requires 4-second warm-up
Tier 4 weapons feel underwhelming at first glance because the warm-up window leaves you exposed, but the sustained beam out-DPSes everything else once it spins up. Pair it with an attack speed chip and the warm-up drops to roughly 2.5 seconds, which is the practical sweet spot for boss damage. The RPGamer review (doloc-town-review) confirms that the Eden-Tagged weapons are intentionally gated behind exploration rather than purchase, so plan farm runs around finding them rather than buying them.
When to Switch Tiers
Switching weapons mid-session costs nothing, so carrying two tiers lets you adapt to encounter type. Many players report pairing a Tier 3 spread for trash waves with a Tier 4 beam for boss windows. If you prefer a single loadout, Tier 3 is the most forgiving option for the bulk of the 1.0 content because the spread covers movement mistakes that single-shot weapons punish.
Enhancement Chip System and Build Synergies
The enhancement chip slot is where drone builds differentiate themselves. Chips drop from elite enemies, can be crafted at the Eden workbench using broken circuitry, and stack up to three at once. According to the game's chip description text, there are four functional families and one cosmetic family.
| Chip Family | Primary Effect | Stack Behavior | Late-Game Value |
|---|---|---|---|
| Attack Speed | +X% fire rate | Diminishing past 2 stacks | High |
| Critical Pierce | Bonus crit chance + ignore armor | Best as 2-of-3 slots | Very High |
| Special Ability | Triggers secondary effect on hit | Unique per family | Situational |
| Defensive Pulse | Drone takes agro + regen | Prevents downtime | Medium |
| Eden Resonance | Cosmetic glow effect | No stats | Fun only |
Building Around Chip Families
A pure attack speed build melts trash mobs but struggles against armored elites like the Skitter Engineers. A pure critical pierce build deletes those elites in two magazines but leaves you squishy during wave defense. The strongest multi-purpose build, reported by veteran pilots in the community Discord, combines one attack speed chip with two critical pierce chips because the pierce stacks apply to the entire spread rather than per bullet.
For bullet hell content, swap a pierce chip for a defensive pulse. The drone's regen aura lets it stay in the fight even after soaking a few chip damage patterns, which is critical because chip deaths usually cost you a minute of revival time. The Drone Chips Guide goes deeper into drop rates and craft recipes if you want specific numbers.
Bullet Hell Patterns and Dodging Tactics
Once you reach the Old City Ruins and 1.0 content, encounters shift from standard AI to bullet hell combat patterns where the arena fills with projectiles for several seconds before resetting. Dodging these patterns requires reading the tell animations and using Proti's movement options, not the drone's.
Pattern Recognition and Dodge Windows
| Pattern Type | Tell Animation | Dodge Direction | Frame Budget |
|---|---|---|---|
| Cross Sweep | 4 lanes light up red | Move diagonally | ~18 frames |
| Radial Burst | Center pulse glow | Sprint outward | ~24 frames |
| Tracking Volley | Drone eye flashes 3× | Break line of sight | ~30 frames |
| Ground Pillars | Tiles flicker in sequence | Jump gaps | ~12 frames |
The Cross Sweep is the most common pattern in the Lichen Cave ambushes and becomes a DPS check because the safe diagonal is also where you maximize hit angles. Spend the early attempts learning the timing, then incorporate damage-dealing movements once the windows feel natural.
Positioning Rules That Hold Up Everywhere
Three positioning rules hold across every bullet hell sequence in the current 1.0 patch:
-
Never stop on the same tile — most patterns re-fire after a 1.2-second cycle if you don't move
-
Use pillars and crates as hard cover — they absorb one projectile before breaking
-
Keep the drone on Auto-Lock during pattern phases — manual aim drags you into red lanes
-
Sprint diagonally during Cross Sweeps — the safe tile always shifts to the opposite diagonal
-
Save your special ability for the pattern gap — the 0.8-second reset window is your best DPS opening
-
Watch for tile flicker before Ground Pillars — the animation starts 0.3 seconds before the hitbox spawns
These rules pair naturally with the broader tips in the combat guide overview, which covers stamina management and the unlisted iframe window after a perfect dodge.
Drone 33 Boss Strategy and Attack Windows
Drone 33 is the recurring nemesis encounter that anchors the combat progression curve. It appears as a scripted mini-boss in the Lotus Marsh, the Old City Ruins gauntlet, and as the final boss of the eastern tower. Each appearance escalates the projectile density, so the tactics that work in the Lotus Marsh version will not carry you through the tower fight without chip tuning.
Phase Breakdown and Recommended Chips
| Phase | Pattern Mix | Recommended Chip Setup | Survival Priority |
|---|---|---|---|
| Phase 1 — Engage | Cross Sweep only | Attack Speed x2 | Learn the safe tile |
| Phase 2 — Pressure | Cross + Radial | Attack Speed + Pierce | Keep moving |
| Phase 3 — Overdrive | All four patterns | Pierce + Defensive Pulse | Stay alive first |
| Phase 4 — Collapse | Tracking Volley spam | Full Defensive Pulse | Wait for stagger |
Phase-by-Phase Tactics
During Phase 1, focus entirely on dodging the Cross Sweep while landing chip-trigger damage. Drone 33 has a 6-second stagger timer once you deal enough chip damage, so opening with one attack speed chip doubles your effective DPS window.
When Phase 2 starts and the Radial Burst joins the rotation, position yourself along the arena's north edge rather than the center, because radial patterns always expand from the boss's anchor point. With Pierce chips active, every spread hit now crits against Drone 33's armor class, which means the phase-2 stagger arrives roughly 40% faster according to community damage logs.
The real difficulty spike arrives at Phase 3, when all four bullet hell patterns cycle through in random order. Switch to Defensive Pulse here because the drone will inevitably eat two or three Tracking Volleys, and you cannot afford the respawn timer. Use the calm moments between patterns to land chip-triggered finishers rather than chasing raw DPS.
In Phase 4, Drone 33 becomes a passive target firing Tracking Volleys on loop. The strategy changes from damage racing to stagger management: hit the boss when it stumbles, back off when it rises, and let your Defensive Pulse chips regenerate drone health between volleys. Players who clear this phase consistently report that the chip loadout matters more than weapon tier, which is why you should treat chip farming as the real grind for this boss.
For broader progression context, including how to reach the Old City Ruins tier where these encounters live, the progression guide maps out the recommended path through seasons and regions.
Recovery and Reset Tips
If you wipe during the tower version of Drone 33, the respawn point drops you back at the entrance with full resources, so there's no penalty for repeated attempts beyond time. Use early wipes to test chip combinations, then commit to a build once you've cleared Phase 2 at least twice. The community generally agrees that Pierce x2 + Defensive Pulse x1 is the safest configuration for first-time tower clears, even though it leaves damage on the table against earlier versions of the boss.
Frequently Asked Questions
What is the best weapon for early combat drone progression?
The Tier 3 Forged spread is the best general-purpose weapon because it covers positioning mistakes and clears elites in two magazines. Players who skip straight to Tier 4 Eden-Tagged weapons often regret the warm-up window during the Lichen Cave ambushes, so unlock Tier 3 first and upgrade later.
How do enhancement chips stack with each other?
Chips from the same family stack with diminishing returns, while chips from different families stack linearly. Two attack speed chips give roughly +30% fire rate, but three of them cap around +38%, which is why most builds mix one attack speed chip with two pierce chips for the best overall DPS curve reported by community data.
Can you switch between auto and manual drone control during combat?
Yes, the control mode toggle is free and instant, so most players keep Auto-Lock engaged for farming and switch to Manual Aim only during boss windows. Defensive Hover is rarely optimal but does have a niche use during the Wetlands tutorial arena where positioning is heavily scripted.
What is the fastest way to beat Drone 33?
The fastest clear uses Pierce x2 + Attack Speed x1 with a Tier 4 Eden-Tagged beam, because the chip-trigger finishers exploit the 6-second stagger window. Players running this build report first-attempt tower clears once they've practiced the phase-2 dodge timing, although the safer Pierce + Defensive Pulse loadout is better for first-time clears.
Does the combat drone work in co-op?
The drone is per-player in co-op, so each settler runs their own loadout independently. Co-op fights scale enemy HP based on party size rather than adding extra attacks, which means bullet hell patterns are identical between solo and multiplayer; the only difference is that revive windows shorten because your teammates can pick you up faster.
Which chip family do you plan to specialize in for your first Drone 33 clear? Drop your build in the comments and we'll share community-tested loadouts that match your playstyle.